Visual builder has its own hierarchy of elements. We can start from the Stripes and proceed in descending order, through Structures and Containers to the Blocks.

You can upload PNG, JPG or GIF images. There are three ways to insert an image:
1. Dropping/Uploading Image
You can simply drag an image from a folder on your computer, or paste it by clicking in the image drop zone and selecting an image from your computer.

2. Inserting an external URL
If you do not have an image stored on your computer, you can enter a link to an image (stored e.g.g. on your FTP server or in the File Manager in Mailkit) in the “External link” field.
If you only want to use this image once, select "Leave as external link" from the drop-down menu (see example above) and click the checkbox 

If you are going to use this image for other email campaigns, click on "Download to the gallery" in the drop-down menu and confirm by clicking on
3. Using images from the gallery
You can use images that you have previously saved in the gallery (see the previous 2 points).
The images in the gallery are sorted by date - from newest to oldest. You can use
If you want to insert an image from the gallery, just click on it and the image will be automatically inserted into your e-mail.
In the setting in the left menu you can e.g.:
- set Link
- add Alternate text to be inserted into “title” and “alt” attributes
- set image Alignment (by clicking on the phone icon you can set the alignment for display in the mobile phone)
Resize the image
set the Padding

To insert a text box into a template / email, drag and drop the block to where you want to insert the text.
In the left menu you can then edit e.g.:
- Text color and Background color
- text Alignment (by clicking on the mobile phone icon you can set a different alignment when displayed on the mobile phone)
- Line spacing
- Padding
- Show/hide block on desktop/mobile
The text can also be edited using the top toolbar.

Creating texts using AI
You can use artificial intelligence (AI) to create your texts to help you with text suggestions of different tones and styles. Based on the input, the AI can generate entire texts, or modify the texts prepared by you. Generating texts is very simple.
Step 1
Insert a text block into your campaign, then activate AI by clicking the "Launch AI" button in the left menu for edit/format text.

Step 2
Enter a request for the AI generator. The request needs to be entered in such a way that the AI can provide you with relevant text. The clearer and more detailed your request is, the more accurate and appropriate the text will be provided by the generator.
Once you're done with your request, just click the "Send to AI" button to start generating the text.

Instead of entering a specific request for text generation, you can also use the function to generate a random title ("Generate random title" button) and random text ("Generate random text paragraph" button).
Step 3
If the AI generated text does not suit you, you can edit it as you need, or you can click the "Send to AI" button again to generate a completely new text.
You can also optimize the originally AI-generated text using other AI functions, thanks to which you can shorten or lengthen the text, translate it into another language, change the tone of voice and more.
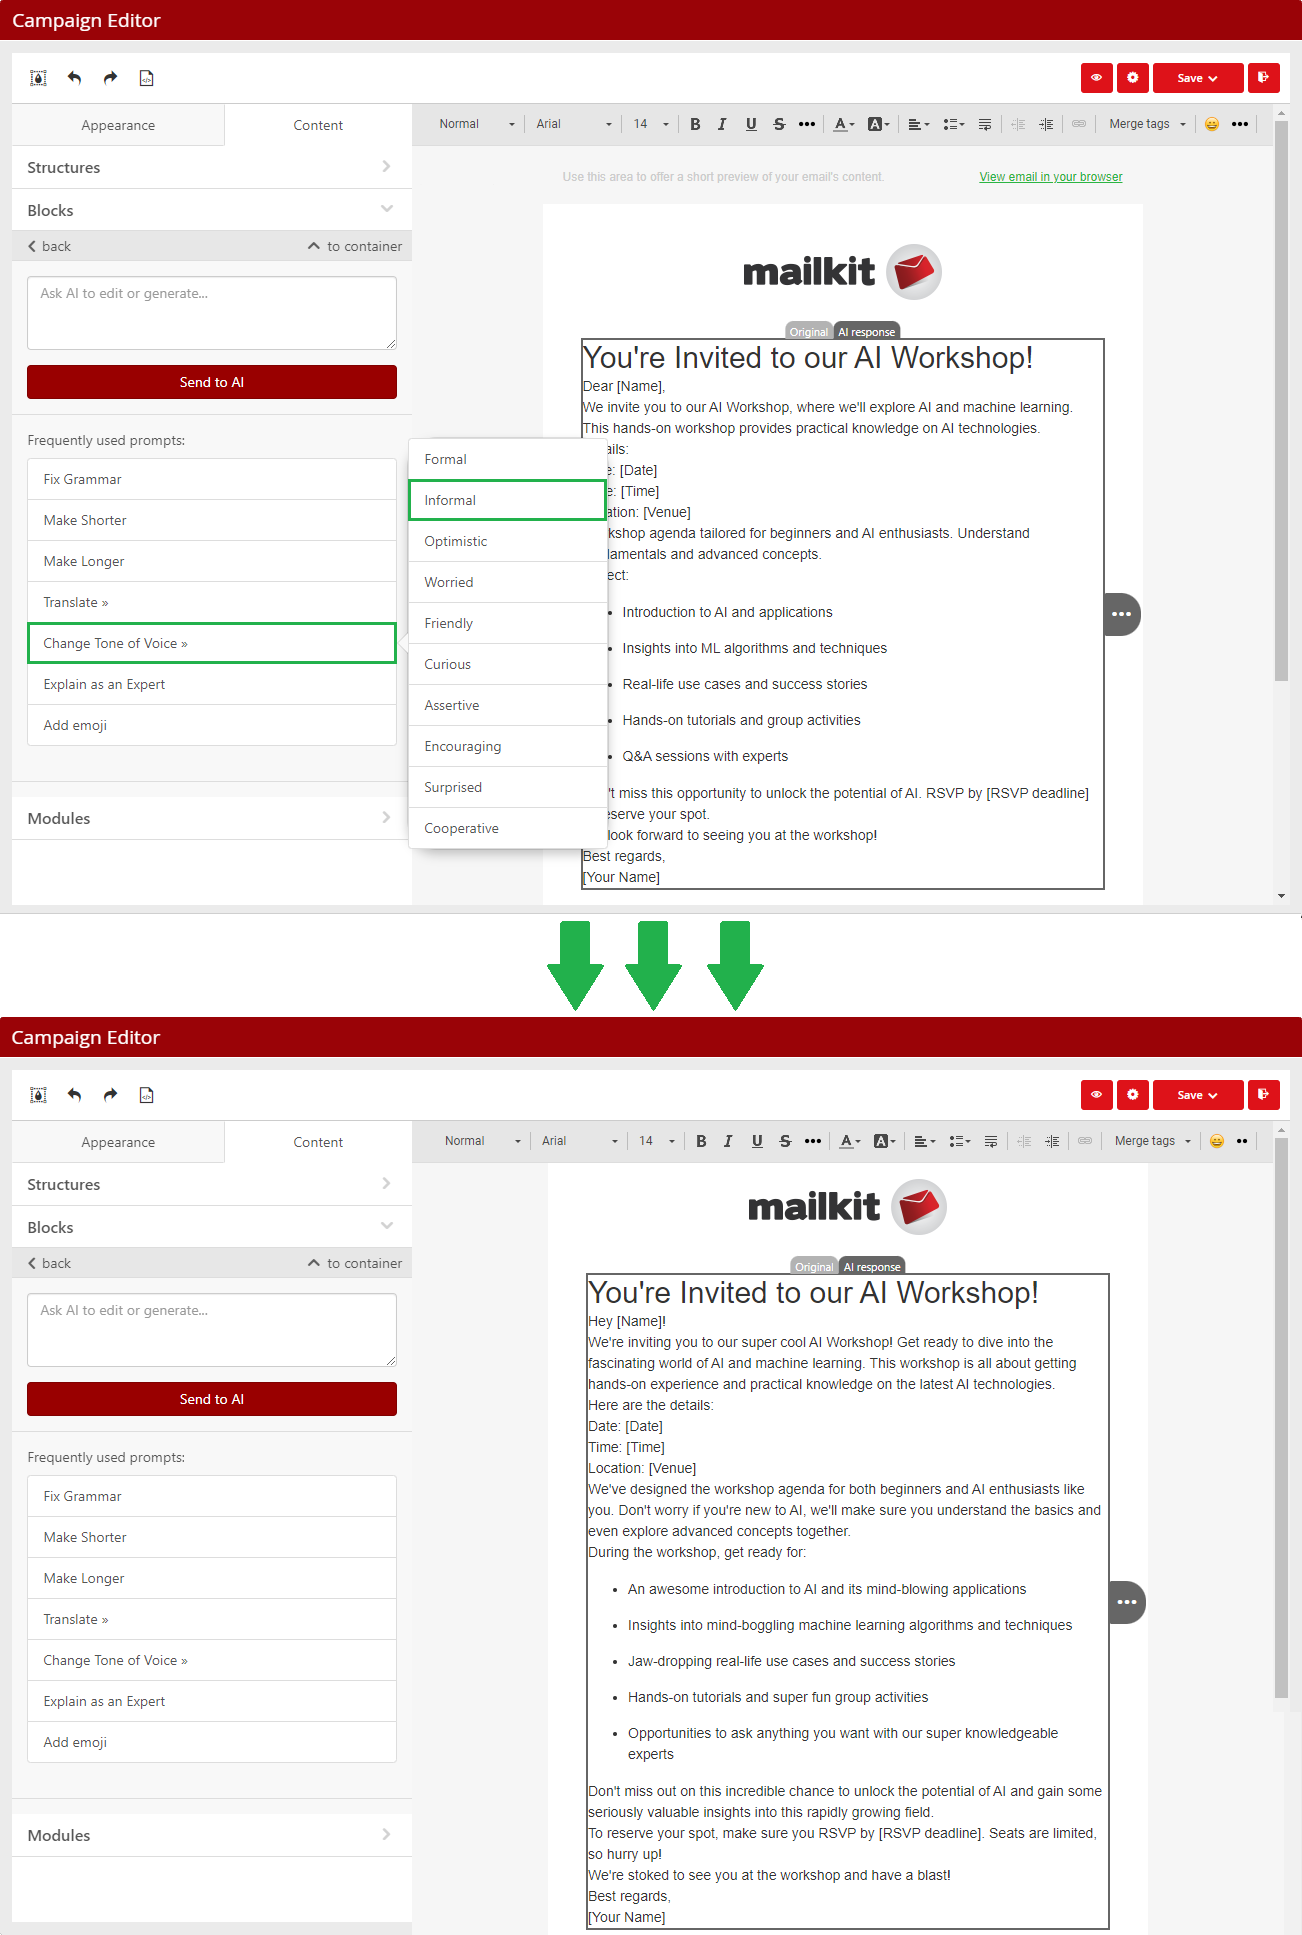
AI can help you to edit your own text
As well as generating new text, AI can also help you edit your text. The procedure is the same as when editing text that was generated by AI. That is:
Step 1
Select the text block you want to edit with AI and click the "Launch AI" button.

Step 2
Choose how the text should be edited, i.e. whether it should be shortened, extended, or e.g. translated into another language.

–> another tab "AI response" will be added in the text field, so you can compare the original text with the new text and possibly edit any of the texts.

By clicking outside the text field, the campaign will then use the text from the Original/AI response tab that was active at that moment.

After dragging the block into the template, you can fill in the URL of the button and its text in the left menu. All other settings are based on the default settings defined in the Appearence –> Button menu.
The parameters can of course be adjusted. If you insert another button elsewhere in the template, it will be set again with the default parameters.
If some parameters are not activated in the menu Appearance –> Button (for example, highlighting the color of the button when hovering the mouse), then it is not possible to work with them when editing the button.

Dynamic spacer -> spacer without line, in the template you can easily adjust its height by simply dragging the mouse.

If the dynamic spacer is not set, you can set eg:
- Line parameters (height, style, color)
- Line Width (as a percentage of the block width)
- Alignment (can be defined differently for display on mobile phones)
- Padding

You can add a video in your email in two ways:
1) By inserting the URL link to your video
This is a method that works in all email clients and on all devices. In the left menu, just insert a link to the video, fill in the fields for the attributes "Alt" and "Title" – the text is automatically inserted, it is of course editable. You can also set e.g.:
- Play button style
- Video Alignment and Size
- Padding
2) Embedding video
Videos added in this way are played directly in emails. Therefore, recipients are not redirected to other websites to watch the video.
However, there are significant limitations to using this method - most email clients do not support this method. It is currently only supported in Apple Mail, native iOS mail, Thunderbird and Outlook for Mac.
How to add a video:
- insert an HTML block into the template
- in the template click “Insert your HTML in the code editor” to open the code editor
- in the code editor, insert the code for the video instead of “Insert your HTML in the code editor”. The code might look like this:
<source src="https://www.mailkit.com/video/video_600x300.mp4" type="video/mp4">
<!-- fallback -->
<a href="https://vimeo.com/mailkit" class="esd-frame-element esd-hover-element esdev-disable-select"><img class="adapt-img" src="https://www.mailkit.com/video/preview_600x300.jpg" alt="" width="600" height="300"></a>
</video>

controls: displays video control bar on clients that support it
poster: URL of the video thumbnail
source src: URL of the embedded video
The first part of the code (above the “fallback”) is for those recipients whose devices and email clients support this interactivity.
The second part of the code (below the “fallback”) is for those whose email clients do not support interactivity –> they are redirected to Vimeo (or any other video hosting site).
By using this code, you make sure that all of your users will see the video you want to share.
After dragging the block into the template, you can customize the block with links to your social networks according to your ideas. By default, 4 icons are inserted. If you need more icons, just click on the "plus" button.
You can choose from a large number of icon styles and three sizes (24 px, 32 px and 64 px).

After expanding the other settings, you can set for each of the icons:
- Link to a profile on the social network
- Insert Title
- Insert Alt text

Of course, you can also set the block alignment (differently for display on mobile phones) or the padding. You can easily set the indent between icons.

After dragging the block into the template and inserting the image, you can make further adjustments:
- Select the part of the image that will be used in the banner (if necessary)
- Set Image orientation – you can choose between vertical, square and horizontal (most popular type)
- You can apply color filters to the image
- Insert link URL and alternate text (alt)
If you need to place any text on the banner image, click the
You can place another image on the banner. It can be anything you like: sticker, frame, logo…

You can add a timer to your email to make your campaigns more efficient.
After dragging the block to the email template, you can further set e.g.:
- the Date and Time of the end of the countdown
- Time zone
- set Timer background color
- Size and color of numbers
- if you want the recipients to see how many days are left, switch the "Display days" button. Otherwise, they will only see hours, minutes and seconds. It is easier to perceive "5 days and 20 hours" than "140 hours"
- value Separator – a colon is used by default
- displaying labels for numbers (“days”, “hours”, “minutes”), you can change in which language they are displayed
You can also upload an image to be displayed to recipients after the countdown has expired, clearly informing the recipient that the coupon / offer has expired and can no longer be used.

After inserting the block into the email, the menu will be displayed in the default appearance - ie. the 3-item menu appears. It is possible to add other items by clicking on the “Add menu item” button, which is located at the very bottom of the menu for editing the “Menu” block.
You can also set:
- whether the menu items appear as Links (text), or as Icons (images), or a combination of both types (in this case, you can choose the alignment of icons and texts)
- Separator of menu items - style, color…
- menu item Text style
- Links color (by default, the color is set, which is based on the settings in the menu Appearance -> Stripes -> Link color)
- Padding (top and bottom)
- for each item you can set:
- Text of the item
- Icon (if set)
- URL link and its color (if it is to be different from the default setting)
- Background color of the item
- Displaying on desktop/mobile phone

After inserting the block into the email template, click on “Insert your HTML in the code editor” –> an editor will open where you can insert your code and continue working with it.

To create a carousel, drag and drop the block into the template and then just add the required number of slides/images.

Because AMPHTML currently supports a minimum of providers (Google, Yahoo ..), we recommend always thinking about a backup variant for recipients whose provider does not support AMPHTML – ie. For example, add an image to the container and assign a view ONLY in the HTML version (thus it will be hidden in the AMPHTML version – recipients with providers who support AMPHTML would otherwise see the carousel and this backup image).
AMP-Accordion is a useful component if you want to hide/show a large amount of content. Allows recipients to view the content outline and go to any section, reducing the need to scroll on mobile devices, for example.
Drag and drop a block into the template to create it. You can set the background, outline or font color and size. Click on the “Add Section” button to add the required number of sections and fill them with content.
Because AMPHTML currently supports a minimum of providers (Google, Yahoo ..), we recommend always thinking about a backup option for recipients whose provider does not support AMPHTML.

